Publish your Obsidian Notes with linked-blog-starter
By the end of this tutorial, you'll have a github repository that will automatically publish notes to your custom website everytime you upload new notes to the publish folder.
Video: https://www.youtube.com/watch?v=rKSpK1dXn4E
Step-by-step instructions to setup your blog
- Fork the repository linked-blog-starter-md repository. This repository is where the publishing occurs

- Create a Vercel account then go to your dashboard then (Add New... > Project)
- Import the repository you just forked
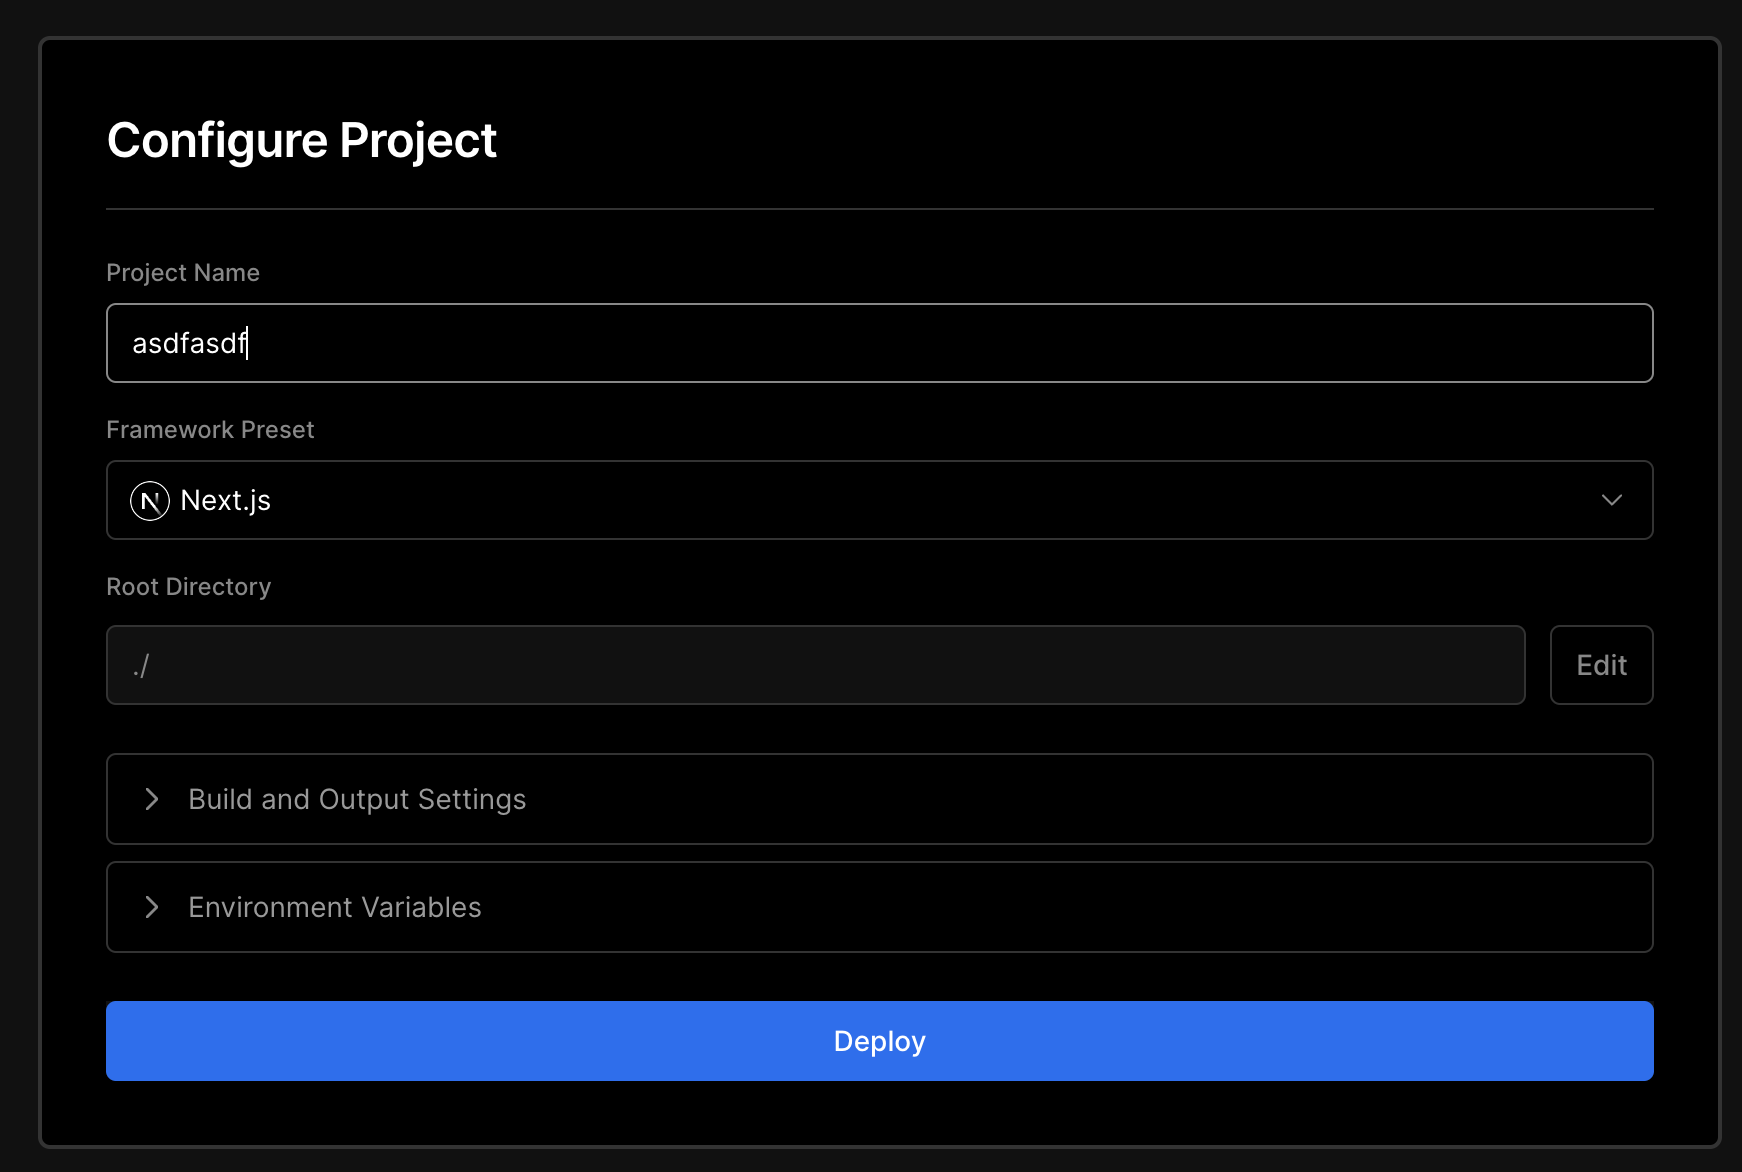
- In the "Configure Project" settings (before you deploy), set the "Framework Preset" to Next.JS . Then click the "Deploy" button.
- After clicking the Deploy button, you'll see that the deploy failed. That's as expected.
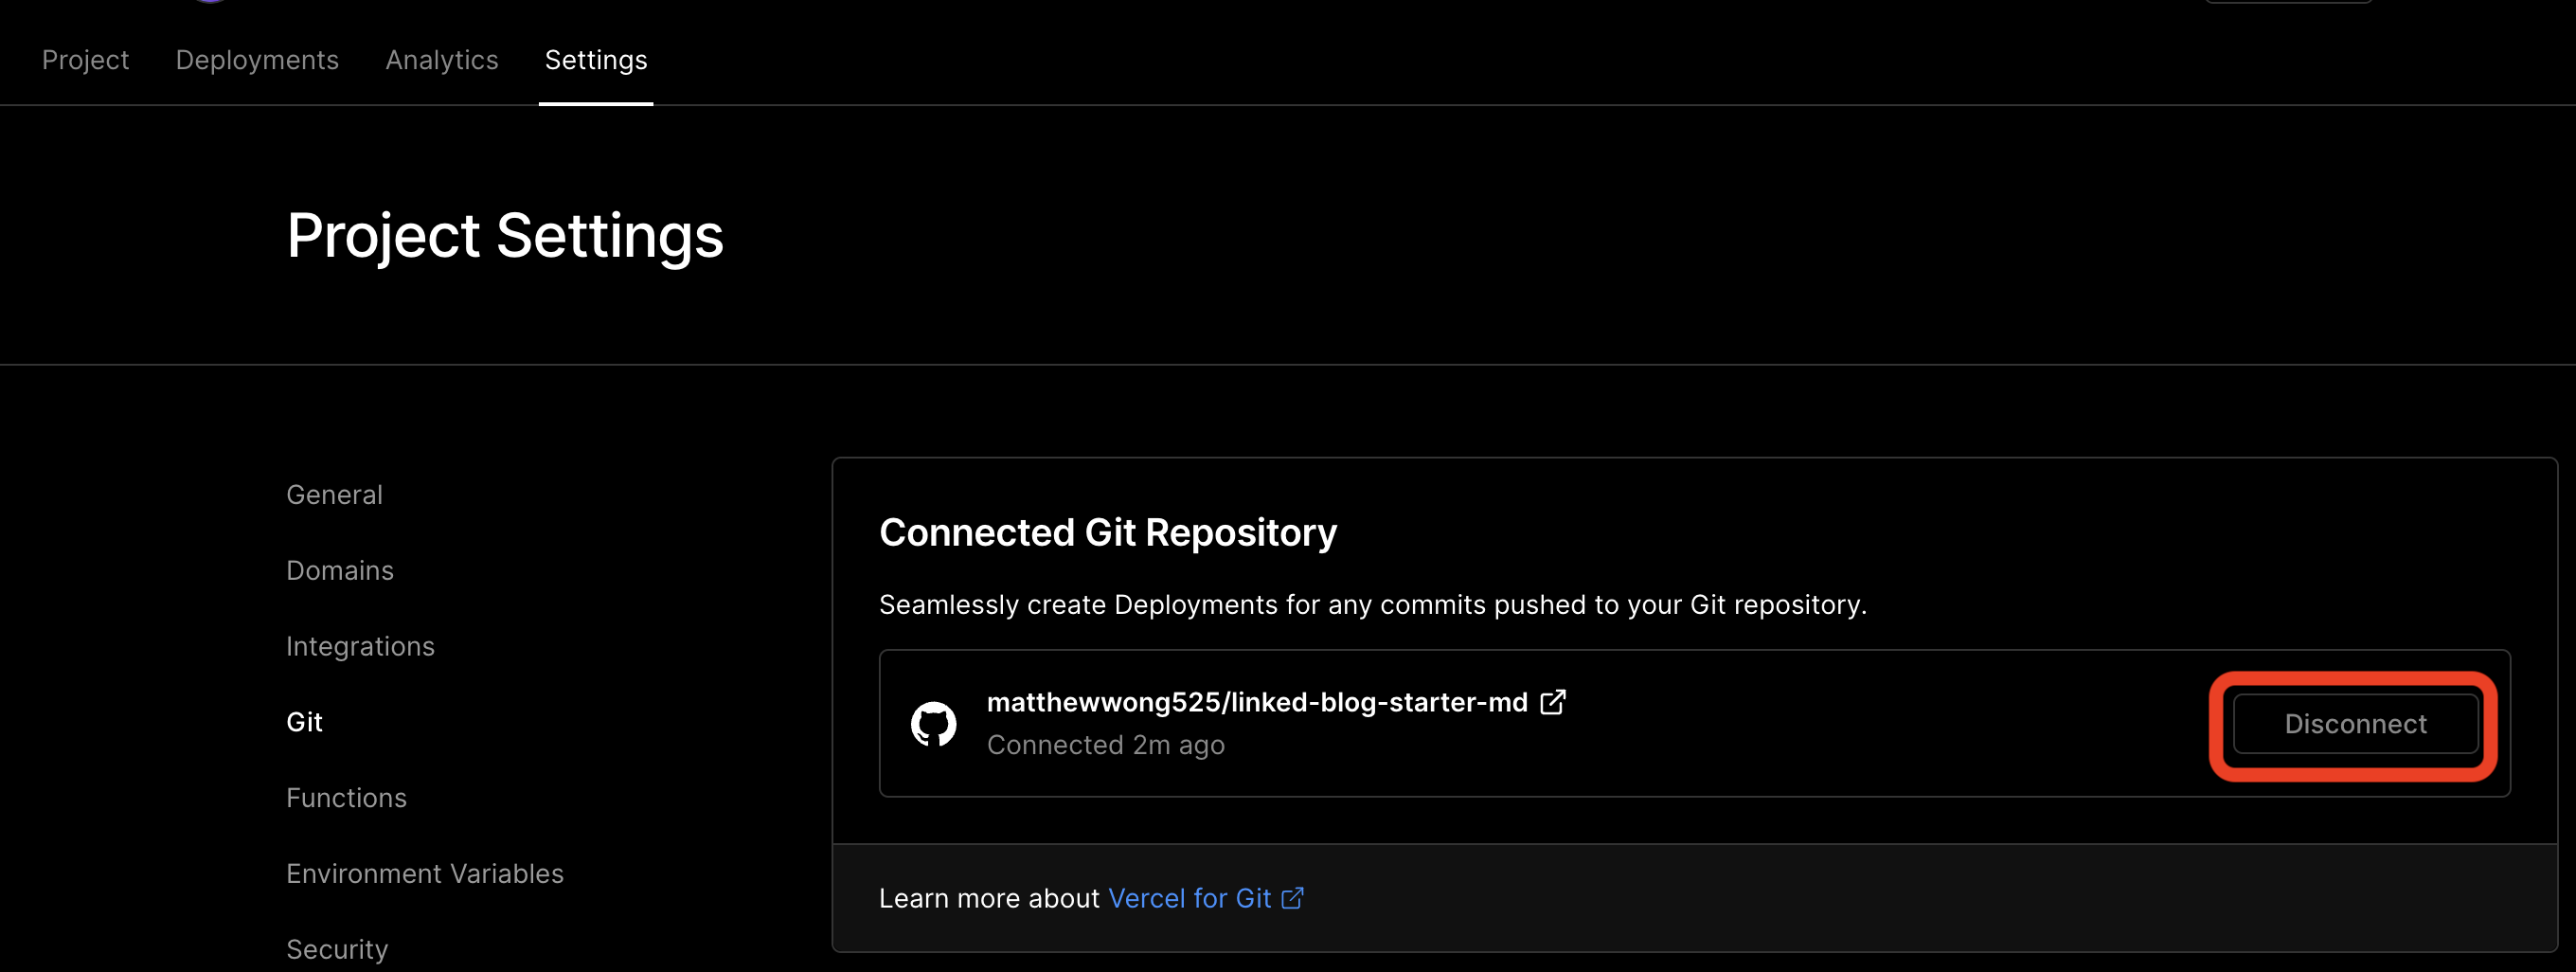
- OPTIONAL: Go to your dashboard, then click on the project you created and disconnect the git repository (Settings > Git > Disconnect)
- Then, get the account id, project id and token from vercelHow to get Project/Account ID and Token from Vercel1. Go to your Project settings, you'll want to copy the project id (Project Settings > General > Project Id). Save this for later. vercel-project-id.png 1. Then go your account id (Personal Account Settings > General > Your ID). Save this for later as well. vercel-account-id.png 1. Finally, generate a token under (Personal Account Settings > Tokens > Create). Finally save the value of the token for the next step. vercel-create-token.png
- Now with the account id, project id, and token, go back to your forked repository and update Github secrets (Settings > Secrets > Actions). Add the following secrets:
VERCEL_ORG_ID,VERCEL_PROJECT_ID,VERCEL_TOKEN
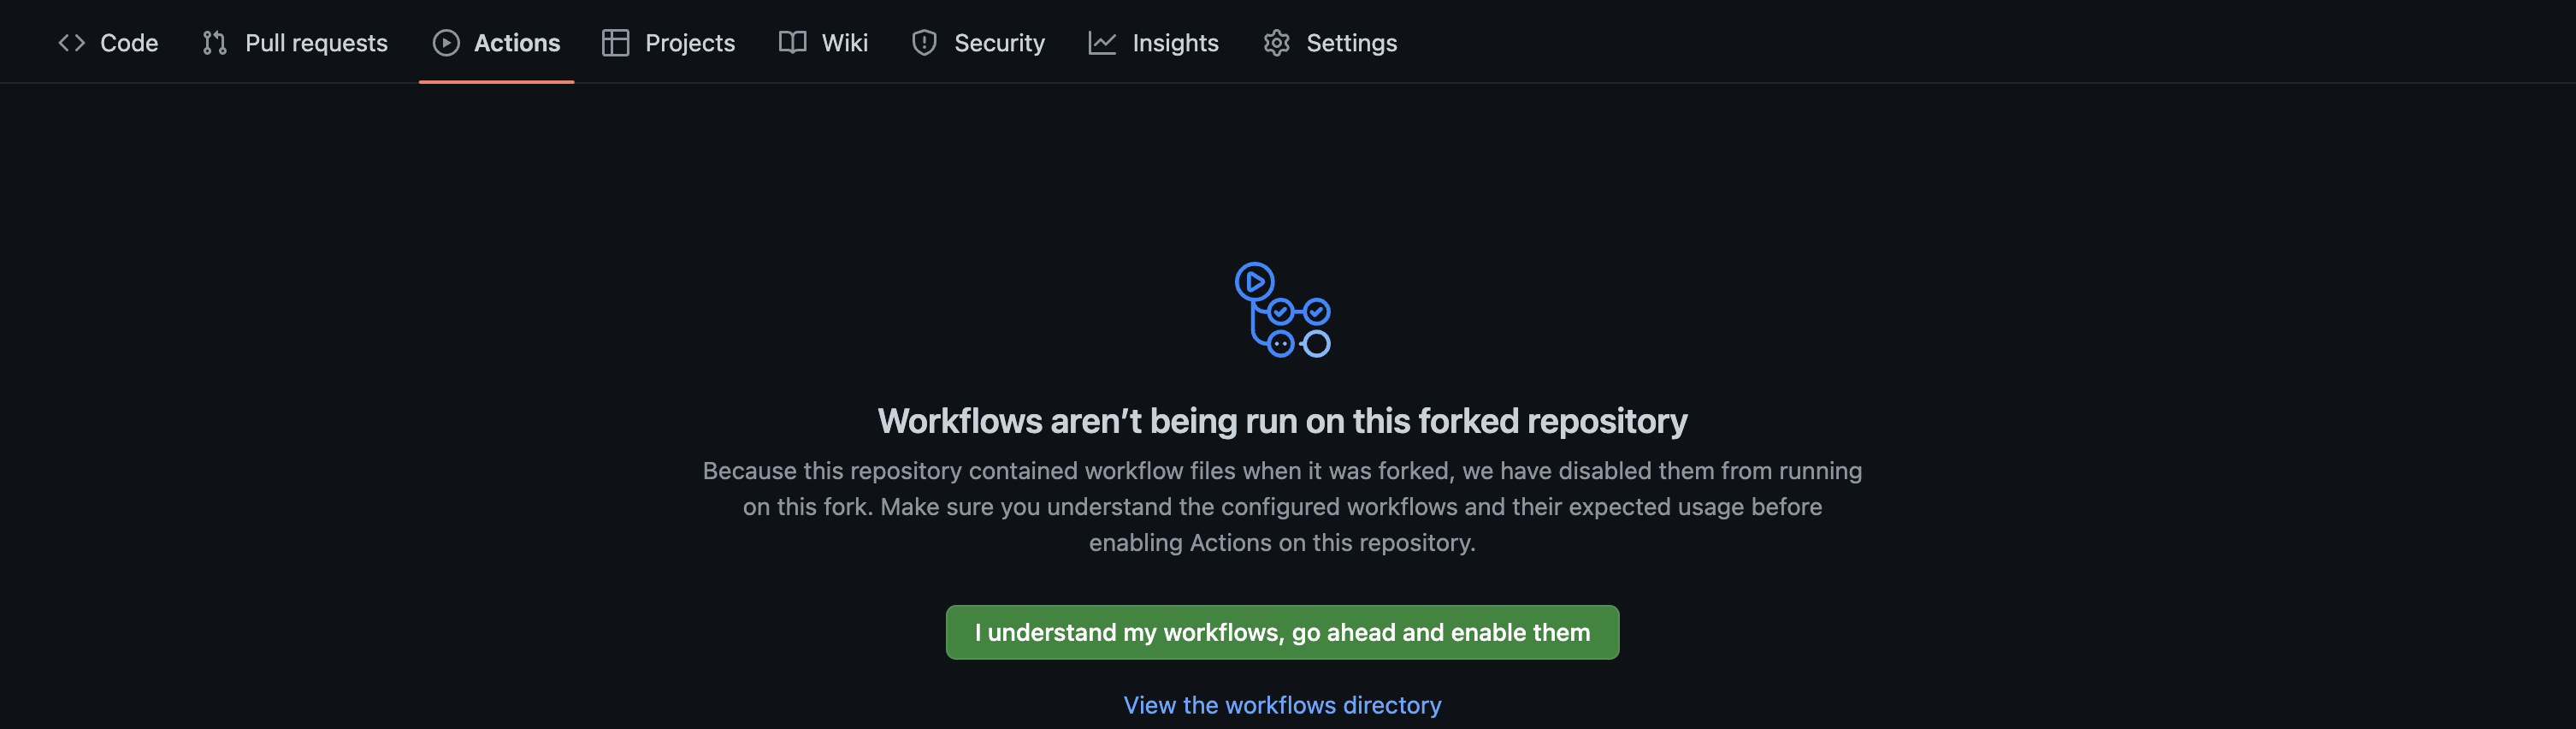
- Finally, click "Actions", and enable the workflow
- Now whenever any notes are uploaded to the
publishdirectory of the repository, they are automatically published online! You can find the domain in Vercel underProjects.
Note: Make sure you don't delete the /publish/home.md file as that is your "landing page"
Optionally, you can:
- Publish Notes within your Obsidian VaultThe Easiest Way to Connect Your Obsidian Vault with GithubI watched a few videos on how to setup the obsidian-git plugin and it feels like most of them overcomplicate the process. So I decided to write a set of instructions and a video to show how easy it to accomplish this even if you have no idea what "git" is. By the end of this tutorial, you will be able to sync your notes from Obsidian to Github for free! https://youtu.be/5YZz38U20ws 1. Create a repository or fork the md repo in github 1. Download Git 1. Create a personal access token from git by installing the Obsidian Git plugin
- Update the publish settingsUpdate the Publish SettingsThere are two things you can modify in the workflow. The publish directory and the blog repository. * BLOG_REPO: Next.JS app repository template that is used to publish your markdown notes. This is useful when you create your own custom linked blog * PUBLISH_DIR: The folder that is published to the linked blog. All files and attachments in this folder will be published on the web Go into .github/workflows/publish.yml in your forked repository forked from linked-blog-starter-md and update the to publish your notes to a custom versionDeploy a custom version of the linked-blog-starterBy the end of this tutorial, you will have a custom version of the linked-blog-starter that deploys to Vercel Fork the repository and get it to run locally First, we want to fork the linked-blog-starter repo, then install and run it locally. Note: Update https://github.com/matthewwong525/linked-blog-starter with your own repository link 1. Clone this repo by running git clone https://github.com/matthewwong525/linked-blog-starter 1. cd linked-blog-starter 1. npm install 1. npm run dev 1. Go of the linked-blog-starter