The Easiest Way to Connect Your Obsidian Vault with Github
I watched a few videos on how to setup the obsidian-git plugin and it feels like most of them overcomplicate the process. So I decided to write a set of instructions and a video to show how easy it to accomplish this even if you have no idea what "git" is.
By the end of this tutorial, you will be able to sync your notes from Obsidian to Github for free!
- Create a repository or fork the md repoPublish your Obsidian Notes with linked-blog-starterBy the end of this tutorial, you'll have a github repository that will automatically publish notes to your custom website everytime you upload new notes to the publish folder. Video: https://www.youtube.com/watch?v=rKSpK1dXn4E Step-by-step instructions to setup your blog 1. Fork the repository linked-blog-starter-md repository. This repository is where the publishing occurs fork-linked-blog-starter-md.png 1. Create a Vercel account then go to your dashboard then (Add New... > Project) 1. in github
- Download Git
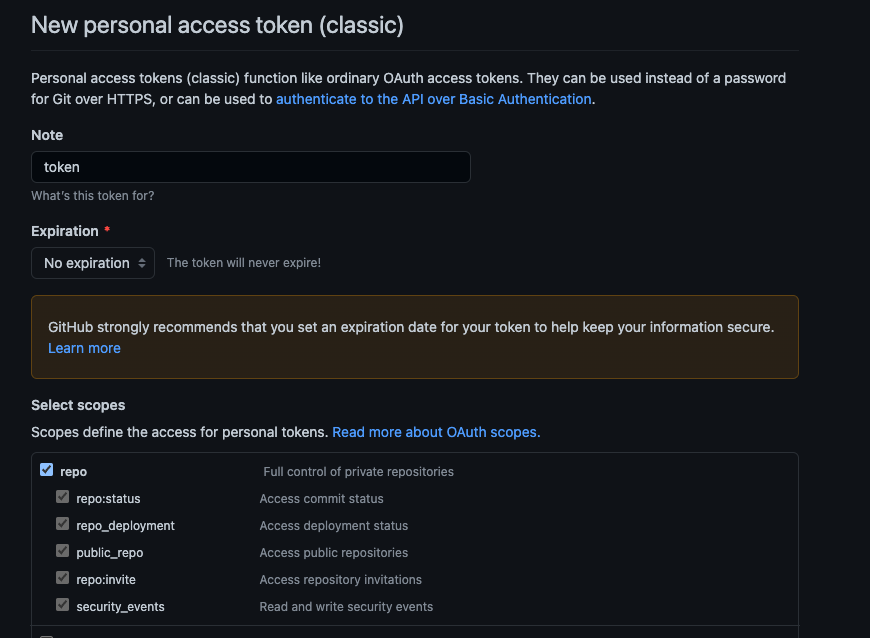
- Create a personal access token from github
- Install the Obsidian Git community plugin
- Create a folder to store the repository. (e.g.
remote-blog/). Set scopes to repo & expiration to no expiration - Run the command (CMD/Ctrl + P):
Clone an existing remote repo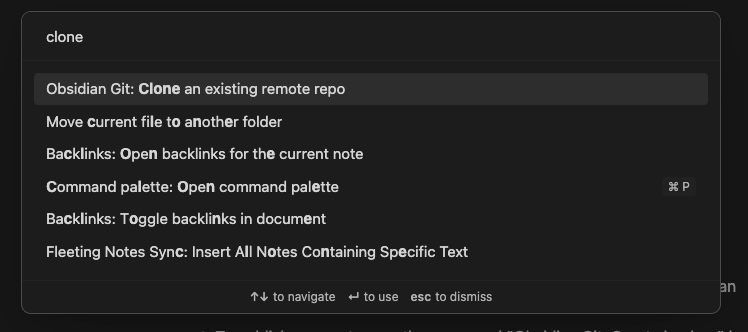
- Paste the URL of the forked repository in the following format
https://<PERSONAL_ACCESS_TOKEN>@github.com/<USERNAME>/<REPO>.git
For example it might look like this:
https://ghp_XXXXXXXXXXXXXXXXXXXXXXXXXXXXXXXXXXXX@github.com/ithinkwong/linked-blog-starter-md.git
- Then type in the folder you created in step 5 (e.g.
remote-blog/) - Restart Obsidian
- Make edits to your notes
- Publish your notes run the command "Obsidian Git: Create backup" by opening the command palette (CMD/Ctrl + P)